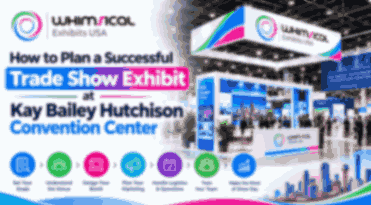
Planning a trade show exhibit at Kay Bailey Hutchison Convention Center starts long before your booth materials show up at the venue. You need to work through your goals, booth size, design, visitor experience, shipping, utilities, installation, staffing, and lead follow-up as pieces of one connected plan, not separate to-do lists.
The venue is in the middle of a major expansion right now, but it’s still one of the strongest venues for Dallas trade show exhibits. During this construction period, which includes demolition of the decommissioned Sections D, E, and F, all exhibit activity is happening in Sections A, B, and C.
That’s exactly why event-specific planning matters more than usual. Whether you’re working with a trade show booth builder in Dallas or handling the build yourself, your booth needs to line up with the assigned hall, current services, freight procedures, and access conditions. This guide walks through the whole process, from early planning to show-day execution and what happens after the show closes.
Chapter 1: Define Your Trade Show Goals Before Designing the Booth
A good exhibit needs a business reason to exist beyond simply filling floor space. Decide what you want visitors to do, and what outcomes you actually want, before you settle on a structural design for your trade show booth Dallas plan.
- Pick one main goal. Lead generation, a product launch, booking meetings, live demos, and brand awareness all call for different booth strategies, so don’t try to chase all of them at once.
- Set targets you can measure. Think in terms of qualified leads, booked meetings, demos delivered, or sales conversations started.
- Know your priority audience. Get clear on which industries, roles, and company types you actually want stopping by.
- Give visitors an obvious next step. That might be a demo, a consultation, a scheduled meeting, or a quick scan-and-follow-up.
- Tie marketing and sales together. Booth activity should feed into your CRM or lead-management process, not sit in a spreadsheet nobody opens again.
Chapter 2: Study the Event and KBHCCD Floor Plan
Your booth doesn’t exist on its own. Its location, the neighboring Kay Bailey Hutchison Convention Center exhibits, aisle exposure, nearby entrances, columns, and available services all shape how it performs.
KBHCCD currently publishes floor plans for the operational halls, A, B, and C. The venue recommends reviewing these plans alongside updates on the ongoing redevelopment, since things can shift.
- Confirm the exact event and hall before you design anything. Don’t work off a generic venue map.
- Study the current floor plan for entrances, exits, aisles, neighboring exhibitors, and traffic patterns.
- Check your booth’s exposure. A corner or island spot usually gives you more open access than a standard inline space.
- Watch for venue changes, since ongoing construction can affect access and day-to-day conditions.
- Get the official exhibitor manual. The event organizer and general service contractor are usually your best sources for event-specific details.
Chapter 3: Choose the Right Booth Size and Layout
Booth size should come from what you need the space to do, not just from how large a footprint your budget allows. That’s true whether you’re renting or buying.
- 10×10 booths work well for focused branding, lead generation, and compact product displays.
- 10×20 booths give you more room for demos, seating, and one-on-one conversations.
- 20×20 booths can hold a few functional zones plus a more substantial product or meeting area.
- Larger island booths support multiple demo stations, hospitality space, private meetings, and stronger architectural features.
- Design around how people actually move through the space, so visitors can enter, browse, and leave without squeezing through tight pathways.
Booth Size Guide
|
Booth Size
|
Best For
|
Layout Priority
|
|
10×10
|
Lead generation, brand presence
|
Open front and strong back wall
|
|
10×20
|
Product demos, conversations
|
Multiple functional zones
|
|
20×20
|
Multi-purpose exhibit
|
Product, engagement, and meeting zones
|
|
20×30+
|
Large brand experience
|
Multiple entrances and dedicated areas
|
If budget or timeline is tight, a trade show booth rental is often the more practical route, especially for a first show at a new venue, since it lets you test a layout before committing to a custom build.
Chapter 4: Design for Visibility and Visitor Engagement
A booth can look great and still fall flat if visitors can’t figure out what you do in a few seconds. Good trade show booth designs communicate from the aisle first, then give people a reason to actually step inside.
- Lead with one strong message. Visitors shouldn’t have to read paragraphs to understand your value proposition.
- Make your brand easy to spot from the common approach angles in the aisle.
- Keep the front open so the booth feels approachable rather than closed off.
- Build in one clear visual attraction, whether that’s a hero product, a bold graphic, or a live demo.
- Give people a reason to stick around, like a product demo, a quick consultation, or a scheduled meeting.
Chapter 5: Plan Products, Demonstrations, and Technology
For most B2B exhibitors, the product itself is the biggest draw. Your booth should make the important products easy to see and the demos easy to follow.
- Feature your hero product front and center. Don’t let it get lost among secondary displays.
- Keep demonstrations visible from the aisle so passersby get curious.
- Plan around equipment needs early, including power, internet, mounting, and floor space.
- Use screens, tablets, and configurators only where they genuinely support the visitor’s journey.
- Bring backups: extra cables, chargers, media files, and offline content in case something fails.
Chapter 6: Organize Shipping, Utilities, and Logistics
Logistics should be planned right alongside the booth design, not tacked on at the end. KBHCCD’s exhibitor information points exhibitors toward their event organizer or general service contractor for freight-marshaling instructions specific to each show.
- Confirm your shipping method: advance warehouse, direct-to-show, or another process your event uses.
- Follow the event-specific marshaling instructions rather than assuming the venue address alone is enough.
- Label every shipment clearly with the booth number, company name, event details, and any contractor info required.
- Order utilities early. KBHCCD notes that electrical service has to go through the utility provider chosen by the event organizer, and up to 100-amp service is available at floor pockets in the exhibit halls.
- Plan internet ahead of time. Extra exhibitor technology services are available, and complimentary Wi-Fi covers common areas and meeting rooms.
Logistics Checklist
- Exhibitor manual reviewed
- Booth location confirmed
- Shipping deadlines confirmed
- Freight carrier selected
- Shipment inventory completed
- Utility requirements confirmed
- Internet requirements confirmed
- Installation labor confirmed
- Outbound carrier scheduled
Chapter 7: Prepare for Booth Installation
Installation should be planned before freight arrives at site. Regardless of whether you are hiring a trade show booth contractor in Dallas or setting up the booth yourself, it’s important to have a clear sequence to stay on track and allow for problem-solving.
- Prepare accurate drawings, including dimensions, elevations, graphic placement, furniture layout, and tech.
- Build a setup sequence, typically structure, flooring, electrical, graphics, lighting, furniture, tech, then products.
- Know exactly who’s responsible for fabrication, installation, electrical, and AV.
- Inspect freight the moment it arrives, checking for missing, damaged, or wrong items before setup continues.
- Leave time for a final inspection so problems get fixed before doors open.
Note: for island booths at KBHCCD, the venue requires a floor plan showing service locations to be submitted at least 30 days before the first move-in day.
Chapter 8: Train Your Booth Staff
Your team is as much a part of the visitor experience as the booth itself. Staff need to know how to greet people, explain the offering clearly, qualify prospects, and steer good conversations toward a next step.
- Come up with a natural opening question instead of jumping straight into a pitch.
- Assign roles so people know who’s greeting, demoing, talking product, or capturing leads.
- Train staff to recognize different visitor types, since executives, engineers, and buyers ask different questions.
- Get everyone aligned on what actually makes a lead worth prioritizing.
- Set up staffing shifts so the team stays sharp and engaged all day.
Chapter 9: Execute a Strong Show-Day Plan
Show day should be about engaging visitors, not scrambling to fix things that could’ve been caught earlier. Walk the full booth before attendees start arriving.
- Check the booth from the aisle to confirm branding, products, and the main message are all visible.
- Test every piece of tech, screens, tablets, demos, internet, lighting, and charging stations.
- Clear out clutter like boxes, bags, and personal items from visitor-facing areas.
- Restock literature, samples, and giveaways throughout the day.
- Hold a quick daily briefing to cover goals, meetings, and lead priorities with the team.
Show-Day Checklist
- Booth clean
- Graphics secure
- Lighting working
- Screens tested
- Product displays ready
- Demonstrations tested
- Lead capture working
- Literature stocked
- Storage organized
- Staff briefed
- Meetings confirmed
- Emergency contacts available
Chapter 10: Dismantle, Follow Up, and Measure Results
The end of the show is really the start of the next phase. Pack up carefully, ship things out correctly, and make sure every promising conversation actually gets followed up on.
- Follow the event’s move-out schedule and contractors’ directions.
- Plan ahead, with inventory lists and photos to help set up for the future.
- Ensure outbound carrier and pickup are confirmed in advance.
- Organize hot leads and those that require nurturing over a longer period.
- See the complete overview, including leads, meetings, opportunities, revenues and total costs.
Successful KBHCCD Exhibit Timeline
|
Time Before Show
|
Main Focus
|
|
6-9 Months
|
Define goals, reserve space, set budget
|
|
4-6 Months
|
Select booth builder, approve concept
|
|
3 Months
|
Review event manual and current floor plan
|
|
8-12 Weeks
|
Finalize booth, graphics, furniture, and tech
|
|
6-8 Weeks
|
Confirm shipping, utilities, labor, and internet
|
|
4-6 Weeks
|
Finalize artwork and booth inventory
|
|
2-4 Weeks
|
Reconfirm deadlines, documents, carrier details
|
|
1 Week
|
Final logistics check and staff briefing
|
|
Setup
|
Receive, inspect, build, test, clean
|
|
Show Days
|
Engage, demonstrate, qualify, capture leads
|
|
Move-Out
|
Dismantle, inventory, pack, ship
|
|
After Show
|
Follow up and measure performance
|
How to Make Your KBHCCD Booth More Effective
- Design for the aisle first. The booth needs to grab attention before anyone actually walks in.
- Keep visitor paths open and avoid furniture or displays that create bottlenecks.
- Use clear zoning to separate attraction, product interaction, conversations, meetings, and storage.
- Make demonstrations visible so the booth feels active from a distance.
- Build storage into the design from the start, since a clean booth just looks more professional.
- Keep technology purposeful. Every screen should inform, engage, or convert, not just sit there.
Common Mistakes to Avoid
- Creating designs on obsolete floor plans. In the case of KBHCCD’s mid-redevelopment, the current conditions of the halls and access matters greatly.
- Not sending without directions as to freight (venue would provide directions to the exhibitor or the exhibitors’ contractor for shipping details).
- Waiting too long to order utilities. Consider electrical and tech requirements early in the design of the booth; not after.
- When boxes are visible, it takes away from a good exhibit unless stored properly.
- Filling the booth or space with too many displays and graphics, which can make even a large space feel cramped.
- Building lead capture as an afterthought, rather than making it part of the booth design from the start.
- Not getting outbound freight lined up until the dismantling process begins.
KBHCCD Exhibitor Checklist
Think of this as your trade show exhibitor checklist for the full event cycle.
Planning
- Goals defined
- Target audience identified
- Booth location confirmed
- Current floor plan reviewed
- Booth size selected
- Booth builder selected
- Budget approved
Design
- Main message finalized
- Graphics approved
- Visitor flow planned
- Product zones created
- Meeting areas planned
- Storage included
Logistics
- Exhibitor manual reviewed
- Freight deadlines confirmed
- Carrier selected
- Shipment labels prepared
- Utilities ordered
- Internet ordered where needed
- Installation labor booked
- Outbound freight arranged
Show Day
- Booth inspected
- Technology tested
- Products staged
- Lead capture tested
- Supplies stocked
- Staff briefed
- Meetings confirmed
After the Show
- Dismantling completed
- Inventory checked
- Freight packed and labeled
- Carrier pickup confirmed
- Leads exported
- Follow-up started
- Results reviewed
Important KBHCCD Planning Notes
This venue information matters a lot right now if you’re planning an upcoming event. KBHCCD is mid-demolition, with Sections D, E, and F decommissioned while construction continues, and Sections A, B, and C still fully operational. The expanded facility is set to debut in 2030 and is planned to include 750,000 square feet of exhibit space.
On utilities, outside generators aren’t allowed, and electrical service has to run through the approved provider for the event.
Conclusion
Planning a good exhibit at Kay Bailey Hutchison Convention Center means connecting your booth plan with the real details of the event.
Start with clear goals. Check the current floor plan. Pick a booth size that fits what you want visitors to feel. Design it to be easy to see and walk through. Plan your products and demos well. Then take care of shipping, utilities, setup, staff, and show-day work.
Since KBHCCD is still under construction, always check the latest event details instead of using old plans.
A good exhibit isn’t just a nice booth. It helps the right people notice you, talk to your team, and take the next step.