Pre-Installation Site Preparation for Large Industrial Centrifuge Equipment
Preparation for site installation for industrial centrifuge equipment begins even before the equipment arrives. This can be thought of as preparing the stage before the main act arrives. Start by evaluating the bearing capacity of the ground. Considering the huge size of the centrifuge, the floor will need to support 7 tons of the centrifuge, plus 1.2 times the weight of the equipment, so its likely 10 tons. If the earth is too weak, you will need to place, and cure. That will require reinforced concrete at least 10-15cm thicker than the floor. Cement will take 28 days to cure, and that is the minimum.
Then, assess the area. The centrifuge will need at least 1.5 meters of space on every side, even if for some reason, they will only be 1.5 meters in each side. This is so the installers will be able to work 'unhindered', and to the future maintenance access. If will thank this space in the future for the maintenance. The area and the equipment voltage; water, air, or other necessary pipelines must also be in place around other utilities, especially if they need to be moved. Huadacentrifuge usually provides a detailed site checklist, so be sure to use it to avoid missing any prep steps.
Do not negate the physical characteristics of the site either. If a site is humid like in the case of wastewater treatment plants, make sure to put moisture-proof pads under the foundation. If there is a high volume of dust in the site like in chemical plants, make sure to install temporary dust covers that will protect the equipment during installation. An onsite preparation can reduce the installation time by 30% and avoid rework in the future.
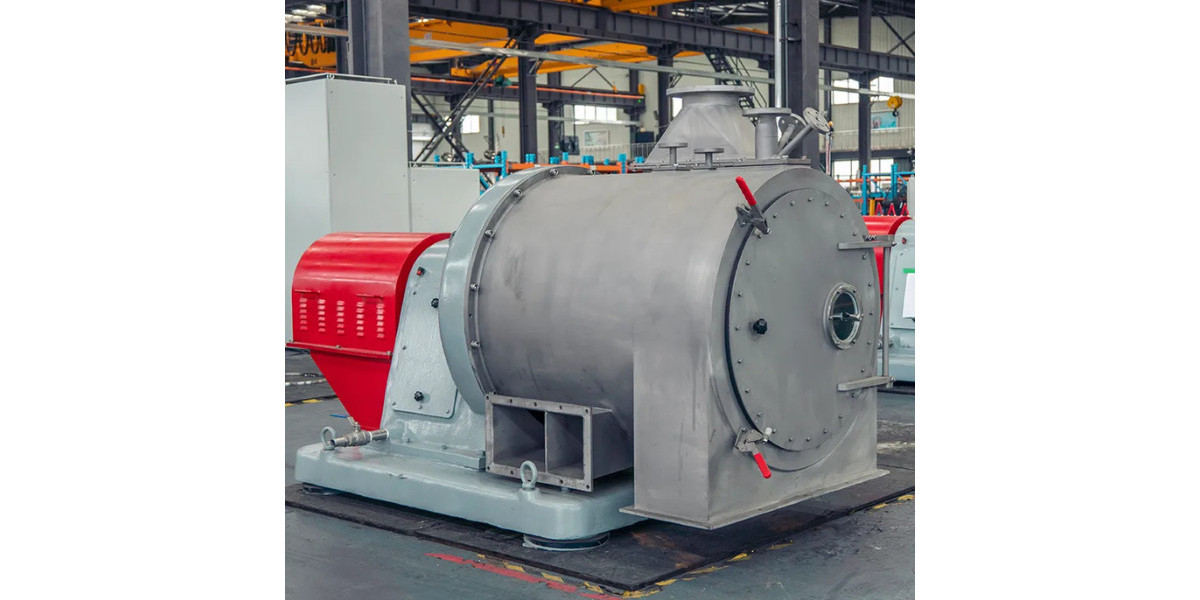
Unpacking and Inspecting Large Industrial Centrifuge Equipment
Unpacking and inspecting large industrial centrifuge equipment is the first opportunity to identify any problems that need to be addressed before the installation begins. Open the packaging carefully and inspect the outer carton for any signs of damage. If there are any dents, tears, or wet spots, be sure to check the internal parts to see if there are any issues as they may have been impacted during transport. If any damages are found, make sure to take photos and send them to the manufacturer to avoid any disputes.
To unpack, use only the manufacturer-recommended methods and tools (do not use sharp tools that may scratch the equipment). Then, use the delivery list and check the drum, motor, controls, and other key pieces to ensure that all the parts compare to the listed pieces and that nothing is missing. During this step, be sure to check for sensors and glass sight glasses as they tend to be fragile and can break easily. For instance, I once saw a team miss a cracked sensor, and it wasn't until commissioning that they found it, delaying production by three days.
Be sure to check the equipment surface for issues as well. Notify the manufacturer if you see things that need to be addressed, such as rusted areas, scratches on the drum's inner wall, or loose wiring in the control panel, and they will most likely send new parts quickly. Huadacentrifuge even provides video inspection support, during which their technicians help you check critical pieces if you are uncertain. This step may take a couple of hours, but it is a lot better than addressing problems post-installation.
Positioning and Leveling of Large Industrial Centrifuge Equipment
Positioning and leveling serve as the "footing" of large industrial centrifuge equipment—if this step is off, the whole machine will run unstable. Firstly, mark the installation position on the foundation according to the manufacturer's drawing. Confirm the distance from the walls and other equipment with a tape measure— even a 5cm deviation can affect future piping connections.
Next, lift the centrifuge onto the foundation with a crane (remember, the crane's load capacity must exceed the equipment's weight by 1.5 times to avoid accidents). After this, the leveling starts: a spirit level should be placed on the centrifuge's base (both lengthwise and crosswise) and adjust with the leveling bolts. An error of 0.10mm per meter is usually the allowable error— don't think "close enough" works here. An unlevel centrifuge will vibrate violently when in operation, wearing out the motor and the drum, leaking from the sealing parts, and causing even more damage.
There was this one time I collaborated with a group that skipped the step of verifying the leveling during the crane moves. It was after the crane lift-off that the equipment had moved 0.3mm. They didn't realize this until the centrifuge shook so badly that it caused a pipe to fall over. After the machine was re-leveled, the shaking completely stopped. Remember, after leveling, allow the equipment to sit for 2-3 hours, and then recheck the level. This allows the foundation to settle the most and the last adjustment can be made. It helps to get this last step because it will save you the trouble of the countless issues the machine will cause with the vibrations.
Connections and Wiring of Large Scale Centrifuge Machines
Connections, like the 'nerves and blood vessels' of a body, are an integral part of a centrifuge machine. Bad piping or electrical connections cause leaks and malfunctions. For the piping, start by cleaning the inlet and outlet pipes which deal with the material, water and sewage. This step will help prevent clogging as well as remove debris like rust and welding slag which can cause damage to the internal parts of the centrifuge. For a proper sealing, use gaskets made of the proper material and ensure to match the material of the centrifuge (e.g. chemical centrifuge with acid resistant gaskets).
Make sure there is no need to force pipes into position. If the pipes aren't matching up with the interface on the centrifuge, change the position of the pipe, don't just push it. An example of this was at a food processing plant, where they tried to force a material pipe into position. This caused the centrifuge's inlet valve to bend. As a result, the valve leaked during operation, contaminating 200 kg of raw materials. To fix long pipelines with pipe clamps. This helps control the amount of vibration transfer to the centrifuge.
For electrical connections, make sure the main power is turned off. This is a safety measure to avoid electrical shock. Next, connect the power cable to the control panel according to the wiring diagram. Be sure not to mix phase wires, this can burn the motor. Then, connect the specific sensors to the corresponding ports, making sure the wires are tightly secured and insulated. After wiring, use a multimeter to check for short circuits or poor connections. This part is easy because Huadacentrifuge provides color-coded wiring diagrams. After this step is completed, cover the control panel with a dust cover to keep out dirt until the commissioning.
Commissioning and Test Run of Large Industrial Centrifuge Equipment
Before large industrial centrifuge equipment officially works, commissioning and test run are the final check, ensuring everything runs as it should. Start with a no-load test. Turn the control panel on and check if the display works, then test the motor's forward and reverse rotation. Ensure it matches the direction marked on the equipment. Run the no-load test for 30 minutes and, during this time, listen for abnormal noises (like grinding or squeaking). Check the vibration level (use a vibration meter if possible). The value should be within the manufacturer's limit (usually less than 0.5mm/s). This level is acceptable.
Then, do a load test. Use the actual material you will process (or a similar substitute), and run the centrifuge at 50% capacity first. Check the separation effect. For example, in the wastewater treatment, see if the sludge moisture content meets your standard. In food processing, check if the product you separated is pure. Then, gradually increase to 100% capacity and run for 2 hours. During the load test, monitor key parameters: motor temperature (should not exceed 80°C), bearing temperature (no more than 70°C), and pressure in the piping.
Stop the machine right away if there are issues like high vibration at full load or poor separation. Possible solutions include rechecking the leveling, changing the inlet material speed, or cleaning the drum. For large models, on-site commissioning support is available from Huadacentrifuge. Their technicians can assist troubleshooting if you are having difficulties. After the test run is completed, all parameters should be documented (running time, temperature, separation effect) to assist with maintenance in the future.
Post-Installation Safety Check of Large Industrial Centrifuge Equipment
Safety checks after installation are non-negotiable—they're the "seatbelt" for large industrial centrifuge equipment. First, check the safety guards: make sure the drum cover, motor cover, and other protective parts are properly installed and locked. These guards prevent hands or debris from getting into moving parts, which could cause serious accidents. Test the emergency stop button too—press it during no-load run; the machine should stop within 3 seconds.
Next, assess the safety features. Most larger centrifuges are equipped with safety features that prevent the drum from moving if the lid is open. Check to see if the safety feature works during a no-load test and the machine is running by opening the lid. It must stop the machine. You should also test the pressure relief valves, the safety alarms, and the no-overtemperature and no-overvibration alarms to see if they activate when settings are exceeded.
Label all safety signs so that they are easy to spot. Ensure that the operators and all staff are aware of the location of the emergency stop button. Lastly, give the operating staff a brief safety training session and provide instruction to not remove the cover during operation, and not to overload the machine. It is a common practice to enable the emergency stop button. Performing these steps and operating the machine as demonstrated and instructed will minimize the risk of an uncontrolled event.
The entire sequence in the installation of large industrial centrifuge equipment—site preparation, unpacking and checking equipment, positioning, pipings, commissioning, and safety verifications—works like a finely-tuned machinery. It should be understood that skipping a link in the sequence, or trying to cut corners, may appear as having saved time today, but will manifest as a safety problem, delay in production, or increased cost in maintenance tomorrow. It should also be appreciated that a well-centered centrifuge will not only run smoothly, but also save approximately 30% of the operational costs, in service life of the equipment. This indicates that approximately 30% of the investment will be saved.
Mash Huadacentrifuge designs its large industrial centrifuge equipment in such a manner that the installation will be convenient. This is demonstrated by the "detailed site checklists" and "color identified" wiring diagrams intended to simplify the tasks of varied levels in the installation team. It should be understood that the installation of a centrifuge is not simply a "one off" task. Instead, it is the initial step in a trajectory that the centifuge is intended to serve the production with equipment reliability for many years.
Installing large centrifuges correctly is as crucial as selecting the appropriate equipment for the task. By adhering to the outlined steps and leveraging the manufacturer's resources, you'll ensure that your centrifuge operates safely, efficiently, and reliably, thereby maintaining operational flow and minimizing headaches.


