Helical piles have become increasingly popular in construction due to their adaptability, durability, and efficiency in providing a secure foundation. Their unique design allows for faster and less invasive installation, making them a preferred choice in various projects where soil conditions or load-bearing requirements demand an alternative to traditional foundation methods.
Step 1: Site Evaluation and Planning
The installation process for a helical pile foundation starts with a detailed site evaluation. During this stage, engineers assess the soil composition, load requirements, and project specifications. Soil testing helps determine the density, stability, and moisture levels, all crucial factors in selecting the correct pile size, helix shape, and depth. Since the efficiency of helical piles relies on their capacity to anchor into stable soil layers, a thorough understanding of the site conditions ensures the piles are installed at an optimal depth.
Step 2: Selecting the Right Equipment and Pile Type
With the site evaluation complete, the next step involves choosing the appropriate pile type and equipment. Helical piles come in various sizes, with each suited to specific soil conditions and load capacities. Typically made of steel, these piles feature a central shaft with helical plates or "flights" that look like large screws. The design helps them anchor securely as they’re driven into the ground. Depending on the soil conditions and load requirements, engineers may recommend single-helix or multi-helix piles.
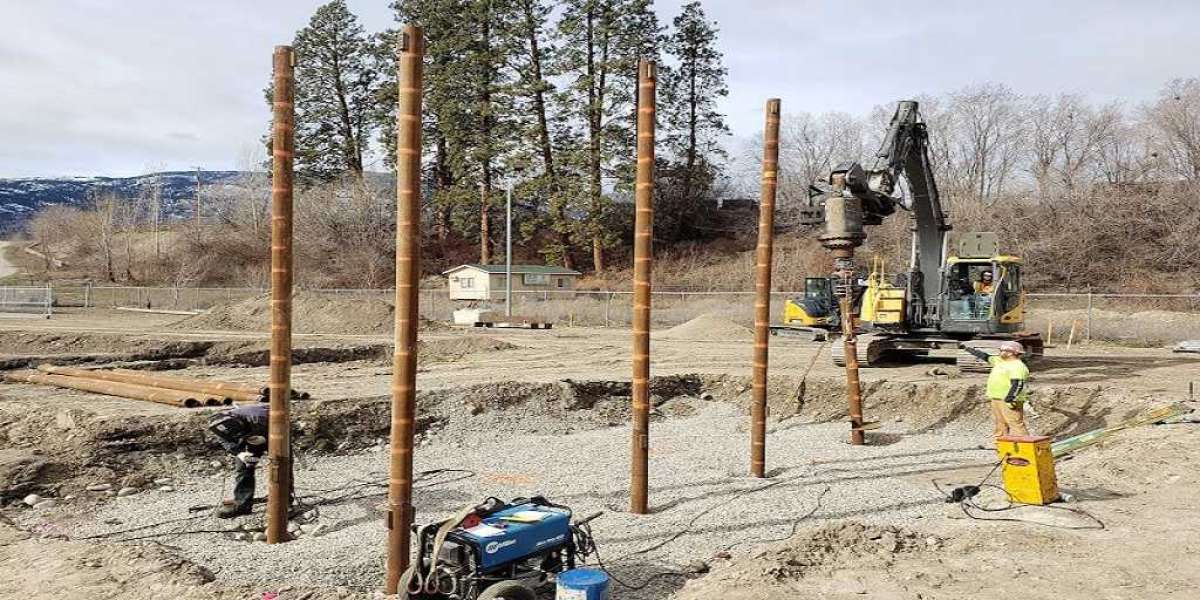
Once the specifications are finalized, specialized installation equipment is selected. Typically, a hydraulic drive head, which can be attached to an excavator, is used to rotate the pile into the soil. This rotation is crucial, as it minimizes soil disturbance and allows the helical plates to securely anchor into stable soil layers.
Step 3: Positioning and Installation
During installation, the helical pile is positioned precisely where the load will be supported. The hydraulic drive applies downward pressure while rotating the pile into the ground, allowing the helices to “cut” through the soil with minimal resistance. This rotation is key to creating a secure foundation, as it enables the helices to grip the soil tightly, providing stability and load-bearing capacity. Unlike other foundation methods, helical pile installation does not require excavation, which reduces the amount of site preparation and minimizes the impact on surrounding areas.
As the pile advances deeper, technicians monitor the torque, which indicates how much resistance the pile encounters. The torque provides essential data on the pile’s stability and bearing capacity. Once the desired depth and torque levels are reached, the helical pile is firmly in place and ready to support the load.
Step 4: Securing the Foundation Connection
Once the piles are correctly installed, the next step is to connect them to the building structure. This connection varies depending on the type of project, but common options include brackets or other custom attachments. The objective is to create a secure and stable link between the pile and the foundation, ensuring the load is evenly distributed across all piles.
For example, in residential projects, steel brackets may be used to attach the helical piles directly to the home’s foundation, providing support and stability. In commercial applications, more complex connection systems may be implemented to handle higher load demands. The final connection is engineered to provide stability, prevent movement, and distribute weight evenly, maximizing the foundation’s integrity.
Helical piles are designed for long-lasting durability. The use of galvanized or treated steel protects the piles from corrosion, and because they are driven into stable soil layers, they provide lasting support without settling or shifting.
For more information about Drilling Contractor Okanagan Valley and Micro Piles Near Me please visit:- ATLAS PILING


