Know How Does Embroidery Digitizing Services Work
Embroidery digitizing services convert images or logos into files for sewing machines. First, you send your artwork or logo to the service, either by email or through their website. Next, an expert uses special computer software to trace all the lines and shapes, deciding where each stitch goes. They also pick the right stitch types, like smooth satin stitches for outlines and fill stitches for solid areas.
After tracing, they clean up the design by smoothing rough edges and closing gaps so the stitching will look neat. Then they save the file in a format your embroidery machine needs, such as DST or PES. Many services also test the file by stitching a small sample on scrap fabric to make sure it works correctly. If any mistakes show up, they fix the file and test again. Finally, you get the finished stitch file, load it into your machine, hoop your fabric, and start stitching. This step-by-step process ensures your embroidered design looks just like your original artwork.
Send Your Artwork To Embroidery Digitizing Services USA
When you want help from embroidery digitizing services USA, you start by sending them your artwork. This can be a PNG, PDF, or a vector file like AI or EPS. Make sure your image is clear and high-resolution so the digitizers can see every detail. You also tell them what item you want to stitch on and the area size, using an embroidery size chart. They will ask questions like “Do you want the logo on the left chest or center back?” After you share all this, they begin digitizing, turning your art into that special stitch file for your machine.
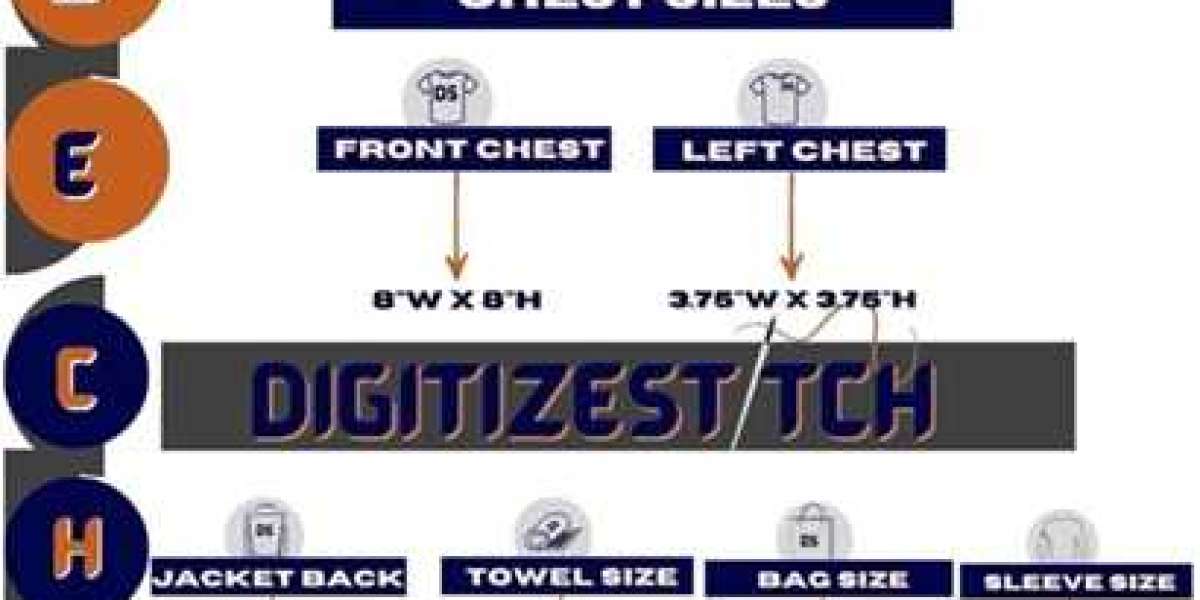
Use An Embroidery Size Chart To Pick The Right Size
An embroidery size chart is a simple guide that shows the best height and width for designs on shirts, hats, and more. When you work with a digitizing service, you use the chart to tell them how big your design should be. First, you measure the space on your fabric. For example, a hat front might fit a 2.5-inch design, while a shirt chest pocket needs 4 inches. You compare your measurements to the size chart and give the service the right numbers. This stops mistakes and ensures your embroidered design looks balanced and neat on whatever item you choose.
What Is Logo Digitizing For Embroidery?
Logo digitizing for embroidery is the process of converting a logo image into a detailed stitch plan for an embroidery machine. Digitizers trace the logo in software, choosing stitch types—like satin stitch for smooth edges and fill stitch for solid areas. They set the stitch density so threads aren’t too close or too far apart. This process keeps letters clear and shapes sharp. When the file is ready, the machine knows exactly where each stitch goes. Logo digitizing makes sure your company’s logo or personal design looks neat, even if it has small details.
Clean Up The Design Before Digitizing
Before machines can stitch your design, digitizers “clean up” the artwork in the software. They remove extra points, smooth jagged lines, and close any open shapes. This step is important because stray points or gaps can cause loops or holes in the embroidery. Cleaning the design also means simplifying tiny details that would be hard to stitch. Digitizers use their skills to make sure every line is smooth and every area is ready for stitches. A clean digital file leads to clean embroidery on fabric, so your final product looks professional and neat.
Choose The Right Stitch Types
Different parts of your design need different stitches. Digitizers pick the best stitch types for each area. Satin stitches work well for outlines and smooth curves because they lay down flat and shiny. Fill stitches cover larger areas like a background or big letters. Running stitches trace fine details. Digitizers also adjust stitch density to keep fabric flat and prevent puckering. Choosing the right stitches helps your design look clear, even after many washes. Digitizing services make these choices for you, so you don’t have to guess.
Test And Make A Sample
After digitizing, it’s smart to test your design on scrap fabric. Digitizing services often send a small sample stitch so you can check the result. You hoop a piece of scrap cloth with the right stabilizer and run the file. Look for neat stitches, clear letters, and no gaps. Measure the stitched sample against your embroidery size chart to confirm the size. If anything looks off, request small edits from the service. Testing helps you fix problems before you stitch on your final item, saving time and fabric.
Try 3D Embroidery Digitizing
3D embroidery digitizing makes your design pop up using a layer of foam under the stitches. If you want puffed letters or shapes, digitizers set up the file for foam underlay. They pick bigger satin stitches and special settings so the foam shows through. You test on scrap to see how high the design stands. 3D works best on hats, jackets, and patches. It gives your design a bold look. When you ask digitizing services for 3D effects, be sure to mention foam thickness and areas where you want the pop-up.
Save And Organize Your Files
Once your design is digitized, save all versions of the file in a clear folder on your computer. Name files with size and item type, like “Logo_Hat_2.5in.dst” or “ToteBag_5in.pes.” Keep both your original artwork and the stitch file. Organized files help you find the right one when you stitch again or send files to embroidery digitizing services USA for changes. Good file management stops mistakes, like using an outdated file, and saves you time on future projects.
Stitch Your Final Project
After all testing and edits, it’s time to stitch on your final item. Hoop your fabric with the correct stabilizer and line up your design using the marks you made. Load the final stitch file into your machine. Watch the first few stitches to make sure it runs smoothly. As the machine goes, keep an eye on thread tension and fabric movement. When it’s done, remove the hoop, trim any loose threads, and press the design lightly if needed. Your digitized logo should now look just like your original artwork, sewn neatly onto your item.